Why video assignments?
In an age of YouTube and TikTok (and what might come next!), creating video seems easy. It can be – but it can involve:
- research
- rehearsal
- resources
- but most importantly – rewards!
No matter what area you are studying, being able to present key concepts clearly via video is a valuable digital skill.
Recording video using PowerPoint (with and without webcam)
Why PowerPoint?
PowerPoint has been a staple tool for presentations since 1987 and has come a long way from slides of endless bullet points.
Many organisations including Griffith University use PowerPoint as a part of the Microsoft Office suite. Using PowerPoint to create video will help you build portable digital capabilities.
Step 1: Check you are using the latest version of PowerPoint
Older versions of PowerPoint do not include the full range of recording functions.
- Install PowerPoint:
- Log in to office.com
- Enter your Griffith email address e.g. bill.brown@griffithuni.edu.au
- Enter your Griffith sNumber and password
- Click Install Office and choose Office 365 apps
- Check if you have the latest version:
- Open PowerPoint desktop application
- Click File
- Click Account
- Click Update Options
- Click Update Now
Step 2: Put some POW into your PowerPoint
We all know the stories of dreary, hard-to-read PowerPoints! You can design your PowerPoints for maximum impact!
- Get great advice on Designing your presentation. (To save a copy of this file, open the File menu.)
- Check out Snapshot of video assignments created using PowerPoint.
- Find copyright free images
Step 3: Record your video
In 2022, Microsoft introduced PowerPoint New Experience for recording in PowerPoint, so you might see either the New or Classic Experience when you go to record your video. The videos linked below show you how to record with each of these views. Mac Users also have these features.
New experience
The YouTube video - How to use the New PowerPoint Slide Recorder - is presented by Mike Tholfsen from Microsoft.
Classic Experience
In this video in Stream you can see how to record video in PowerPoint.
Note:
PowerPoint files with videos over 5 minutes long attached can be too large a to submit to canvas.
Step 4: Export your video
- Open the PowerPoint Desktop App (you can’t export a video in the browser version)
- Go to File menu
- Choose Export
- Choose Create a Video
- Check the settings
- Click Create Video
- Choose the location and Save
Using Studio to submit your video assignments
If you are experiencing any issues with your submitting your assignment, check out our Fixing common assessment issues guide.
Step 1: Be clear on what is required
Make sure you check the assignment requirements particularly:
- length of the recording
- style of recording
- whether you need to be visible via webcam
- other files that also need to be submitted (e.g. script).
The library provides a thorough list of questions to consider when planning your video assignment.
Step 2: Record your video
Here are the most common types of recordings for video assignments.
- Record using PowerPoint (with and without webcam)
- Record your screen using Canvas Studio (with or without webcam)
For more information, see
- How do I record a screen capture video in Canvas Studio with a Safari or Firefox browser?
- How do I record a screen capture video in Canvas Studio with a Chrome or Edge browser?
If you're using a MAC, some apps may not be enabled for screen recording by default. To check this navigate to System Preferences and select Security and Privacy to adjust your screen recording settings and enable the apps you want to record.
- Record on mobile device
- Record as a group
For more Information see, Develop Digital Skills, Record and Edit Video.
Step 3: Upload your video to Studio
Your Studio library is your personal video collection in Canvas, and is stored outside of your courses. You can access your library at any time via the Canvas menu at the far left of the screen. This means you can download your videos to add to other portfolios – a great back up of your hard work!
To add your video to your Studio Library:
- Choose Studio in the Canvas menu
- Click Create (top right corner)
- Click Add Media
- Scroll down to Browse Files
- Select your video from your computer
Step 4: Submit your video

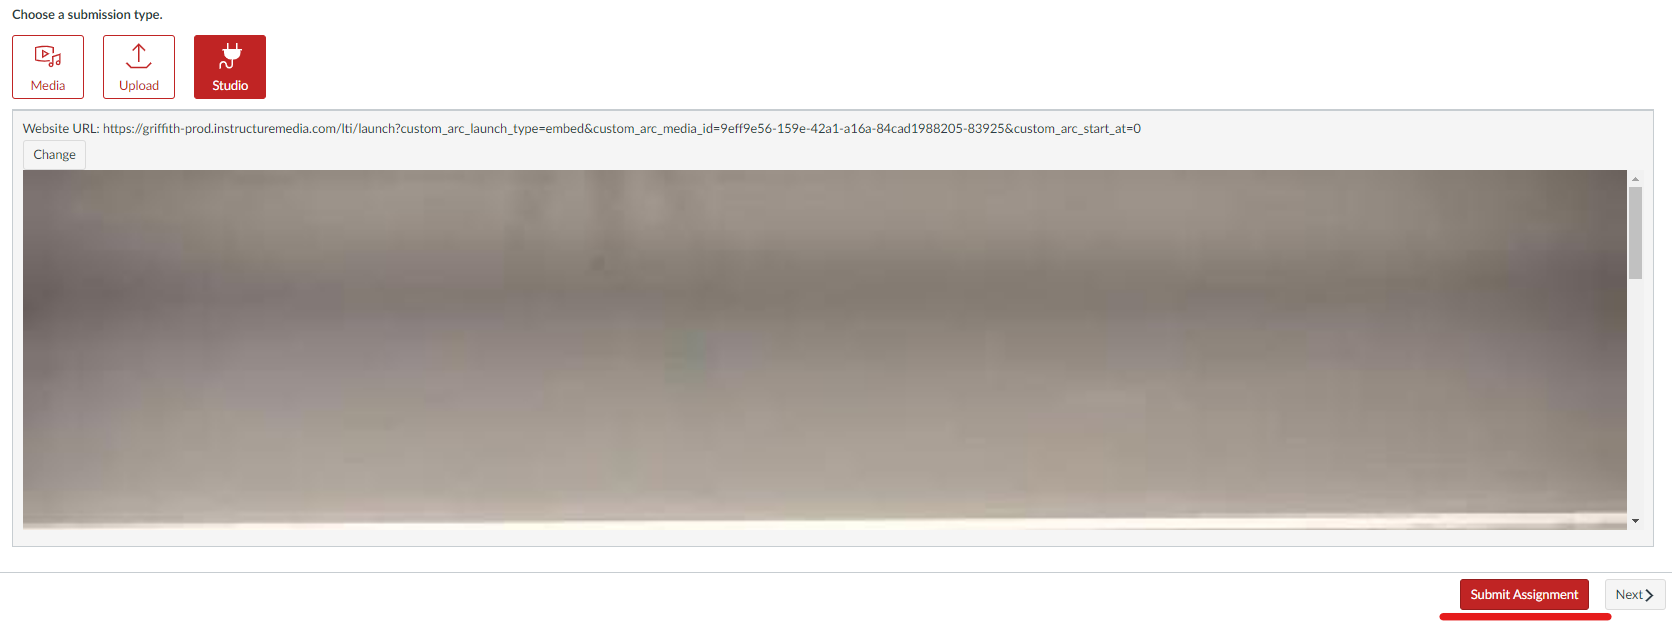
Method 1: Submit using the Studio tile
- Go to the assignment submission point
- Select Studio as your submission type (Don’t upload your video file)
- Select the video from your library
- Click Embed
- Click Submit Assignment

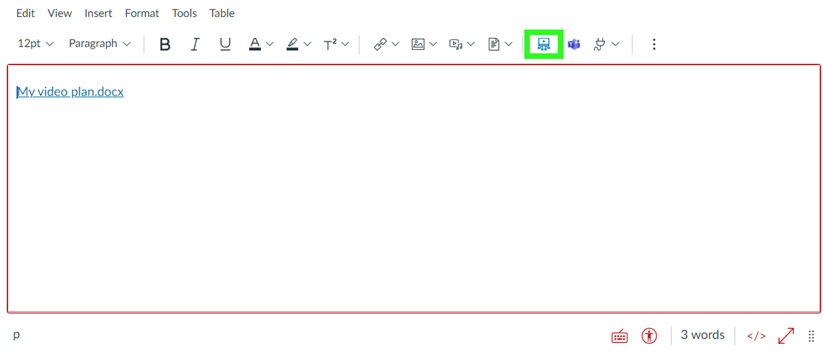
Method 2: Submit using the Text Editor
You might do this if you need to submit your video and another file, such as your PowerPoint or script.
- Go to the assignment submission point
- Select Text as your submission type
- If you need to add another file:
- Go to the Insert menu
- Choose Document
- Choose Upload document
- Click Submit
- On the Editor ribbon, click the Studio button
- Select the video from your library
- Click Embed
- Click Submit Assignment

Information on applying for special consideration, deferred assessments and extensions can be found with our Frequently asked questions.